This ionization chamber radon detector is designed to be easy for the student or hobbyist to build and use. It can form the basis for a variety of experiments for Science Fair competitions, class projects, conversation pieces, or simply satisfying scientific curiosity. Despite the extreme simplicity, the chamber can detect surprisingly low levels of radon by detecting the radioactive "radon daughters" produced when radon gas decays. The detector could be used to investigate a variety of scientific questions and demonstrate scientific principles:
Ordinarily, radioactive materials around you are safely bound up in solids, like trace amounts of radioactive isotopes of uranium, thorium or radium, trapped in the concrete and earth beneath your feet. But these radioactive materials "decay" into lighter elements, emitting energetic sub-atomic particles in the process. One of the lighter elements in the chain of decay is radon, a radioactive, noble gas. Since radon is a noble gas, it is chemically inert and doesn't stay bound in the solid the way it's parent did. It diffuses right through solids and ends up floating freely in the air. Being a noble gas, radon is fairly harmless, itself. You breath in some radon with every breath but then you breath it right back out, since it isn't chemically active or electrically charged. But radon has a short half-life of only about four days, meaning that about half of it will decay within four days, producing new, even lighter radioactive isotopes of other elements like polonium, lead, and bismuth. Those isotopes keep decaying, until a stable isotope of lead is reached. These radon "daughters" are not noble gasses like radon, they are usually ionized when they are produced, and they will readily stick to anything nearby, like healthy lung tissue. They typically have an even shorter half-life than radon and quickly decay inside the lung, kicking out energetic alpha and beta particles that can cause tissue damage and potentially trigger lung cancer. This unfortunate chain of events is due to the decay chain including a noble gas! Radon gas is considered to be the second leading cause of lung cancer, even though her daughters are the real culprits.
Radon daughters will stick to just about anything they encounter, so they are easily collected by drawing air through a dusting cloth with an ordinary fan. After collecting the daughters for about an hour or two, the radiation being emitted from the cloth due to the further decay of the collected radioactive isotopes can be measured with a simple ionization chamber made from an empty coffee can, a single Darlington transistor, and a digital voltmeter. The deceivingly simple ion chamber is quite sensitive and can detect radon daughters in buildings with radon concentrations below the "action level" recommended by health authorities.
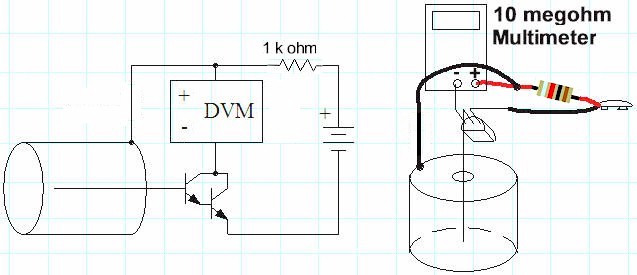
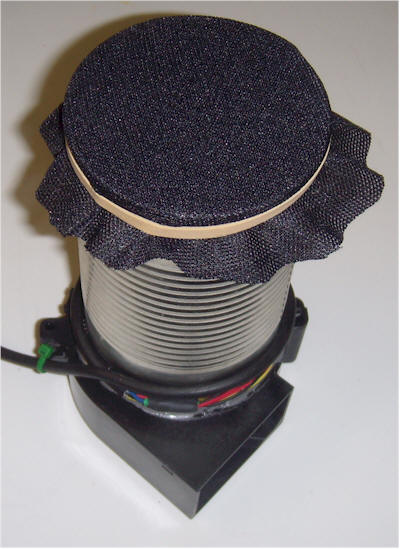
A simple ionization chamber is nothing more than a metal can with a wire inside. When a radioactive particle passes through the air in the chamber, many of the molecules of air are ionized, having electrons knocked loose from the outer atomic shells. Applying a positive voltage on the outer can relative to the internal wire, causes these ions to be attracted to the wire and the free electrons to be attracted to the interior wall of the can. This movement of charge is a tiny current that may be amplified to detect the rate at which ions are being generated, and thereby the rate that radioactive particles are passing through the can. The simple chamber described below is capable of detecting extremely tiny currents. When a digital DVM, with a 10 megohm input resistance is on a voltage scale, 10 millivolts on the meter corresponds to 1 nA flowing in the meter (10 mV / 10 megohm = 1 nA). Assuming the gain of the transistor is about 30,000, the base current is 10 nA / 30,000 = 33 fA or 0.000000000000033 amps, a very tiny current, indeed! A single femto-ampere is the flow of 6,240 electrons per second so a change of 10 mV on the meter represents a couple of hundred thousand electrons being liberated every second. There's quite a lot of activity going on in that small volume of air when you place the radioactive sample in front of the foil window and the reading climbs several tens of millivolts. The chamber will be detecting mostly beta particles. Alpha particles can't make it through the aluminum foil window.
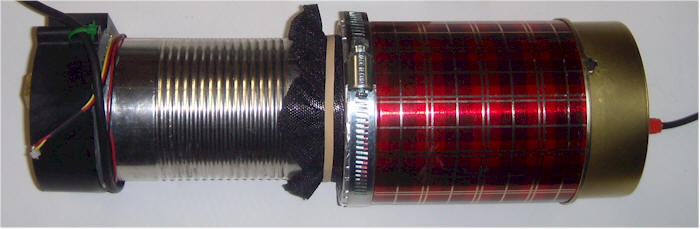
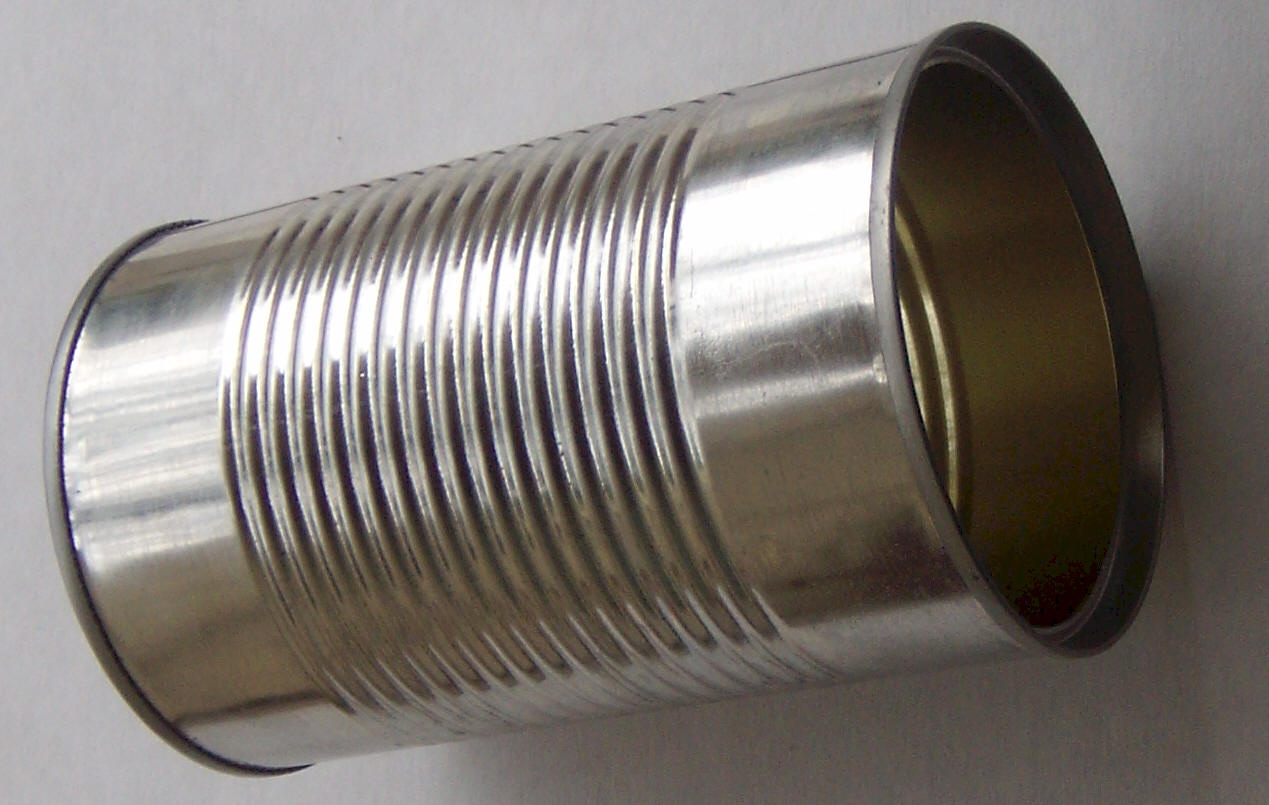
First, acquire an empty metal can about 5 inches tall, with a 4 inch diameter to be used as the ionization chamber. Typical cans include a small coffee can, a baby formula can, or a holiday snack tin. The size is not critical. Also find another short tin with a slightly smaller diameter with a height of 1.25 inches or a little more. These tins are commonly used for hard candy. This smaller can will shield the electronics. It is necessary to shield the circuit from external electric fields.


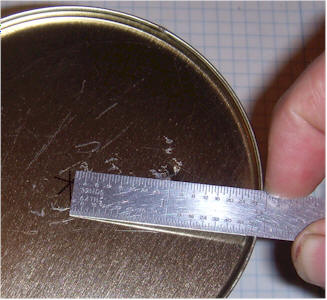
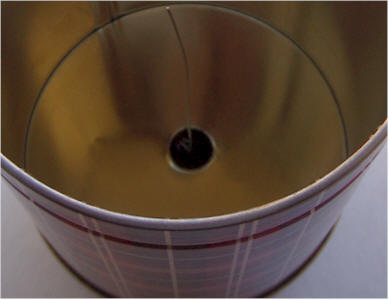
Find the center of the bottom of the ionization chamber can. A simple way to find the center is to measure the diameter and divide by 2 to determine the radius. Now, use a fingernail pressed against a ruler to establish the radius, press the fingernail against the can, and draw a few lines from different directions to mark the center. The center isn't critical.
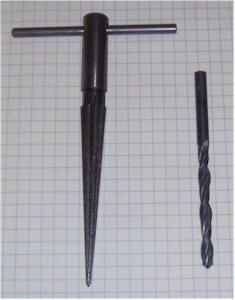
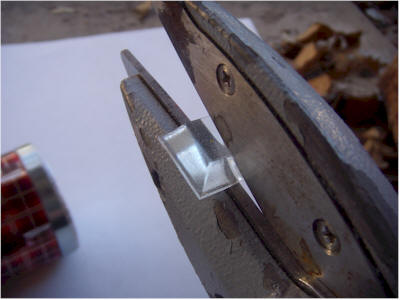
It can be difficult to drill a clean hole in the thin metal and a satisfactory alternative is to drill a smaller hole and use a hand reamer to widen the hole to about 1/2 inch diameter. The excess metal will form a short, ragged tube extending into the can instead of breaking off in bits but the hole will be smooth and round on the outside.
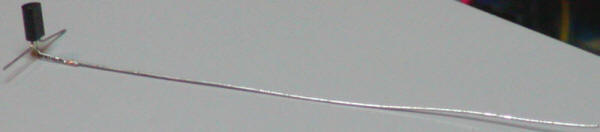
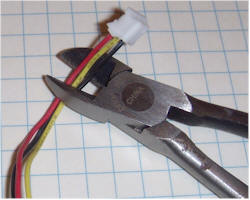
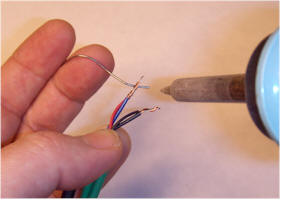
Bend the base lead (middle pin) of the MPSW45A Darlington Transistor at a right angle, extending away from the flat side of the body. Solder a piece of solid, 22 or 24 AWG bare wire to the base lead. Cut the bare wire to be shorter than the ion chamber can by 3/4 inch.
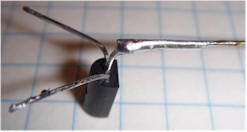
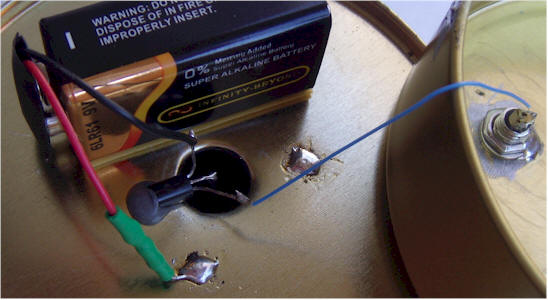
Apply a small amount of epoxy to the top end of the transistor, keeping the epoxy well away from the leads. IMPORTANT! Don't get the epoxy on the center lead! Other NPN darlington transistors will work well in this project but the MPSW45A has an extra-tall package, making it easier to keep the epoxy away from the legs. Pass the long wire into the can and press the flat side of the transistor against the outside bottom of the can, allowing the epoxy to spread onto the can. You may solder a temporary wire to the can to help hold the transistor while the epoxy cures. Check to make sure the center lead is free from any epoxy.

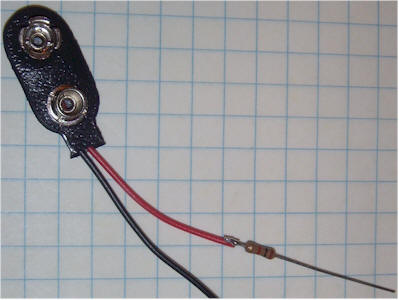
Solder a 1k resistor in series with the positive (red) battery snap lead and cover it with heat shrink tubing or electrical tape. This resistor may be left out, but accidentally shorting the transistor base lead to the can will destroy the transistor. The resistor is a good idea!
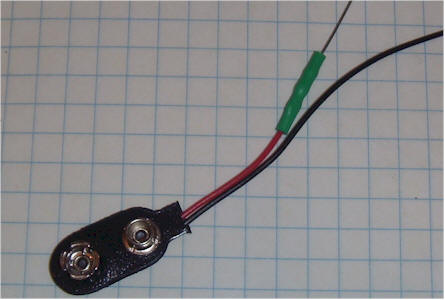
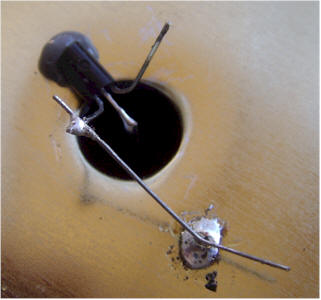
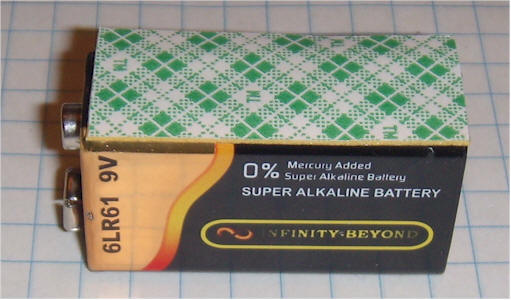
Apply some double-sided foam tape to the edge of a 9 volt rectangular battery on the side that will result in the wires from the battery snap coming out on top. Stick the battery to the bottom of the ion chamber can near the hole. (The battery may also be glued into position. A new battery might last over 10 years.) Connect the positive lead (or optional resistor) directly to the can. Connect the negative battery lead (black) to the emitter of the transistor (left lead with the flat face down and the leads pointing away from you). Connect a thin, flexible 3 inch wire to the remaining collector lead (right lead with the flat face down and the leads pointing away from you). This should be a thin, flexible wire so that it doesn't pull on the transistor very hard as you move things around. 30 AWG "wrapping" wire is ideal.
|
|
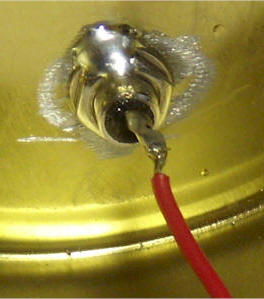
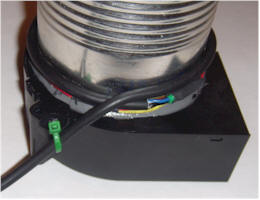
Drill a 1/4 inch hole in the bottom of the short can near the edge. The location is not critical. Use fine sandpaper or a rotary tool to remove the enamel coating around the hole on the inside of the can so that the washer will make electrical contact. Mount the RCA phono jack in the hole. It is hard to tighten such a connector in thin metal without damaging the connector or bending the can. So, optionally, snug it up reasonably tightly and solder the nut to the can and threads to keep it in position. Other connector types will work. Simply running the wire through the hole is adequate, but you will need an additional wire for the can connection.
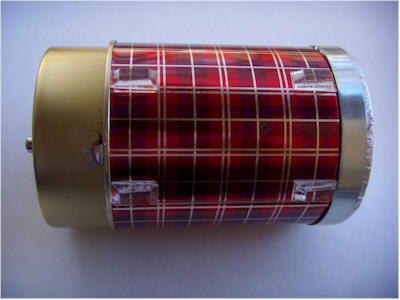
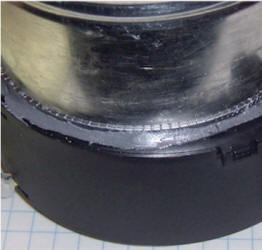
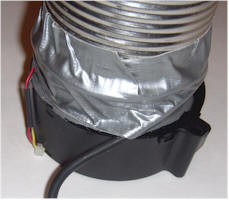
Position the two cans together making sure the connector doesn't hit the battery and the wire stays away from the center lead of the transistor. Holding the two together with a good orientation, mark across them with a marker in two or three locations. Sand off the finish on both cans near the marks with fine sand paper. You just need to expose the bare metal so that solder will adhere. Connect the battery snap to the battery, and tack solder the two cans together, using plenty of heat and solder. The circuit draws virtually no power so the battery will last many years, essentially its shelf life. When soldering the cans together, let the iron sit several seconds to heat both cans. Right before removing the heat, add a little more solder and the fresh flux will brighten the joint.

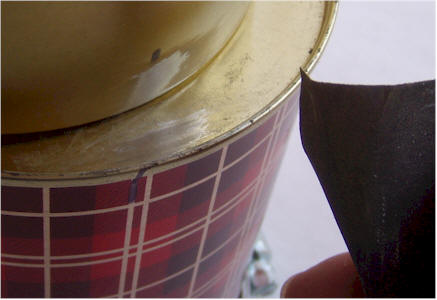
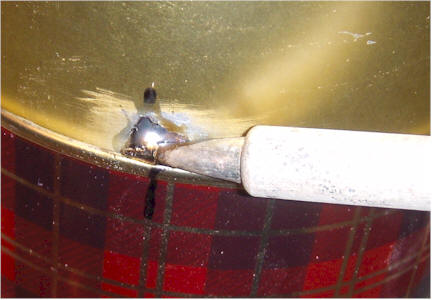

Find a circular object with a slightly larger diameter than the ion chamber can and use it to draw a circle on a piece of aluminum foil. Sand the paint off the lip of the can so that the aluminum foil will make electrical contact. You may try to use a rubber band or tape to affix the foil but it is difficult to let go of the band without destroying the foil. After you destroy a few pieces and learn a few new words, try a large pipe clamp. Make sure the foil is pulled tight against the sanded lip of the can so that electrical contact is made.

Add rubber feet to whichever side looks like the bottom (not critical). Large, adhesive-backed rubber feet can be cut in half with heavy scissors or tin snips. The resulting thin feet will fit to the curved can better.
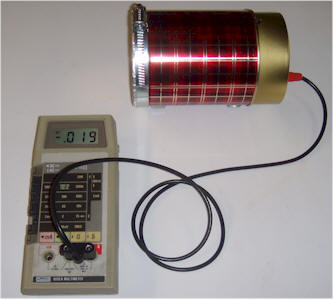
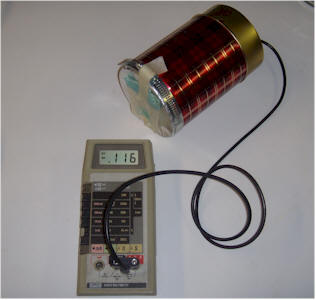
The chamber is finished! Connect it to a digital voltmeter set to the 1 or 2 volt scale. The reading should drop to a few tens of millivolts, depending on the room temperature. In the cool laboratory, the background reading is 19 millivolts. Taping an older thoriated lantern mantle to the foil window increases the voltage reading to 116 mV! Remember, most newer lantern mantles don't contain thorium.
It is easy to collect radon daughters, those dangerous radioactive isotopes that form when radon gas decays. Simply draw air through some sort of material and they will rapidly collect. The photo below shows a simple collector that is easy to build.
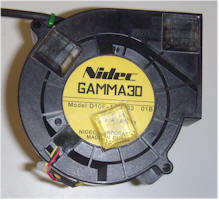
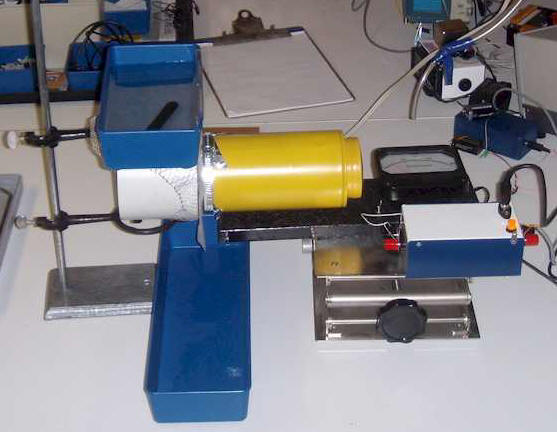
The collector consists of a DC-powered squirrel cage fan drawing air through an empty soup can with some filter material secured over the opposite end.
Cut off both ends of an ordinary soup can and remove the label:
Affix the can to the intake of a squirrel cage fan using epoxy. Apply a bead of epoxy to the lip of the can, making sure to leave no gaps, and seat the can on the fan's intake, making sure no epoxy drips into the fan:
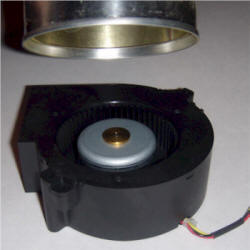

The can may be offset from center a little, as long as the intake is completely covered. After the epoxy has had plenty of time to cure, cut any connector off the end of the fan's cable and remove some insulation from the red and black wire:

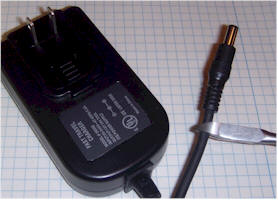
This fan has an unneeded yellow sense wire that was cut short. Cut off the end of the power supply cable and strip off some of the outer insulation:
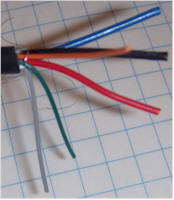
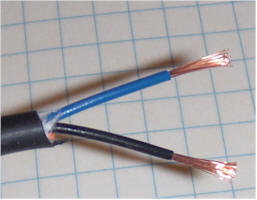
Some power supplies have lots of wires, but most are not connected. Often the unused colors will pull right out of the cut off connector, but the most reliable way to find the right two wires is with a voltmeter. Plug in the power supply and find the two thicker wires that have the power supply's rated voltage across them. Note the polarity and unplug the supply. Strip those two wires and connect them to the fan with red going to positive and black going to negative. Plug in the power supply to verify the fan spins. For the supply shown, the blue wire from the supply was positive and goes to the red wire of the fan and the black wire from the supply was negative and goes to the black wire of the fan. The other wires may be cut short. Connect the wires by twisting them together and soldering or securing with wire nuts or electrical tape. The pictures show a typical assembly using solder and heat shrink tubing:
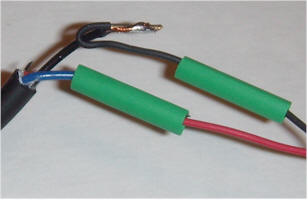
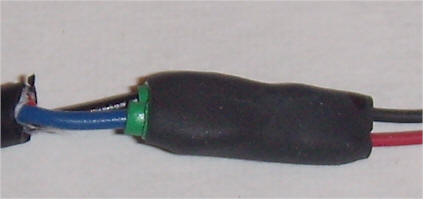
Just twisting the wires together and securing with electrical tape is fine, too. But, make sure they won't short together.
To strain relieve the wires, wrap the cable around the can and secure with duct tape or cable tie:
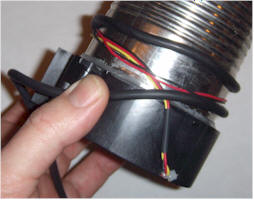
The cable tie looks neater but the important point is to avoid pulling directly on the wires from the fan. The green cable tie passes through a blind hole on the fan that was drilled all the way through. Add some feet to the bottom of the fan so that it can stand vertically. Rubber feet will keep the assembly from moving around due to the fan's vibration. Secure a piece of speaker grill or dusting cloth to the open end of the can with a heavy rubber band:
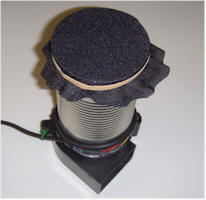
The black cloth in the picture is replacement speaker grill cloth. Other materials to try include, thin dust cloth, nylon mesh (stocking, tights, etc), porous fabric, open cell foam, and paper from a "HEPA" air filter. Plug in the fan and verify that it pulls air through the filter. That' it! Also see another accumulator design.
The first experiment is to verify that radon daughters are being collected. Here are the steps:
Turn on the fan with the filter facing up and let it run for an hour or two, preferably in a basement room or a room with little air flow and sheetrock or concrete walls, foundation, or countertops. An attic might be a poor choice! Connect the ion chamber to a DVM and turn on the meter. Make an initial meter reading and record it on paper. The reading should be just a few tens of millivolts. Now, unplug the fan and tip the collector over to the horizontal position. Depending on the location of your can on the fan motor, you may wish to add some rubber feet to keep it steady when in a horizontal position. Move the end with the collection cloth as close to the end of the ion chamber as possible without pressing on the foil with significant force. If all is working properly, the meter reading should climb for several seconds and settle out at a significantly higher reading, indicating that radioactive material has collected on the collection cloth. Well ventilated homes may have few radon daughters in the air and it may be necessary to repeat the test in an older building with lots of masonry, or in a basement. Try remote areas of the building where there is little airflow and rock-based building materials like exposed cement or sheetrock. Basements in some parts of the country may require the meter be switched to a less sensitive range!
If all goes well, some radon daughters should have been detected as an increased voltage reading. To proceed, a simple set of experiments could be to try different collection materials to find the most effective. Thicker materials like ordinary paper towels will collect more efficiently but the airflow is greatly reduced. Thin materials will have greater air flow, but may let the radon daughters slip by. The best choice of filter materials may not be obvious.
Once the system is working reliably, several experiments are possible:
Using a timer or clock, plot the meter reading vs. time after the radioactive filter is placed against the ion chamber foil window. The radiation will drop exponentially as the various isotopes decay. Find the point where the meter reading has dropped half way to the background reading and record the time. This time is the approximate average half-life of the collected isotopes.
Run the fan in different rooms or other locations for a specific time, perhaps an hour, and measure the resulting radiation. Different locations are likely to exhibit different levels of radiation due to different levels of radon gas. Can you map the levels and make an educated guess as to the source of the radon? How does the radon level vary with time of day in the different locations?
Measure the radon coming out of a tub of water. I'll let you figure out how. Shower curtains and duct tape are likely to be involved. Plus understanding parents. It can take nearly a week for the level to stabilize, so use a guest bathroom! A kid's swimming pool is another option. Note: this experiment will work best with well water. City water tends to be exposed to the air for long periods and the radon gas has time to escape or decay. If you happen to live in an area with unusually high radon levels in the soil, it might be possible to detect radon gas in the city water. And, it might be interesting to see if one can determine how long the water has been in the system by comparing the levels at the home tap to levels at the source, say a lake feeding the treatment plant.
Pitch a plastic tent with no floor, seal it as well as possible, and see if radon builds up inside from the earth below. Remember, the half-life of radon is 4 days, so it will take at least that long for the level to stabilize. It may prove difficult to achieve sufficiently low air flow in and out of the tent.
Visit old buildings, caves, etc. with your accumulator and detector. A hefty 12 volt battery will be needed for running the fan for extended periods. Remember, the radioactivity on the collection cloth decays quite rapidly, so you don't have a lot of time from when the collector fan is turned off to when the measurement is made.
What is the effect of lighting a stick of incense in a room that measures a significant level of radon? My experiments along those lines were surprising. Plot the effect vs. time. For continuous measurements, try pointing the filter cloth directly at the aluminum foil window, but leave a gap of about 0.2" or the thickness of a piece of corrugated cardboard. Plug in the fan and let the reading settle for an hour. The gap allows air to sneak in around the edges so you can plot the radon level continuously. The more advanced experimenter could replace the voltmeter with a computer data taker for automatically making plots. But there is nothing wrong with the manual labor approach!
How hard is it to reduce the radon level in a room? Plot the radiation level before and after ventilating the room. It may take several hours for a small fan or open window to make a noticeable effect. Radon has a half-life of 4 days. So, a tiny fan that replaces the air in a basement in 4 days (that's pretty slow) should cut the radon significantly. Design a heat exchanger using ordinary aluminum vent pipe to save energy when pumping fresh air into the building. A 3" pipe supported by cardboard rings inside a 4" pipe might be the ticket. The outside of the 4" pipe would need good insulation. Outside air would be drawn in via the 3" pipe, approaching the temperature of the surrounding air in the 4" pipe as it goes. The 4" pipe would lead outside and air from the house would approach the outside temperature as heat is exchanged through the wall of the 3" pipe. Since the air coming into the room is already near room temperature and the air going outside is near the outside temperature due to the heat exchange, the head exchanger greatly reduces the energy cost associated with bringing fresh air directly into the house. The 3" pipe should extend a few yards past the ends of the 4" pipe on both ends so that the same air isn't simply travelling in a circle.
Do various stone materials stored in a basement raise the radon levels? Try enclosing bags of sand, cement, plaster, etc, in a large, fairly airtight cardboard box, along with the collector for a day. Turn on the fan for an hour or two to collect the radioactive isotopes and use the ion chamber to make a measurement. Start by measuring the collected radioactive elements in the empty cardboard box as a control.
Plot the decay of all the radon in an enclosed box. Place the collector and ion chamber in an airtight box and run the meter wire out in such a way that the box remains fairly airtight. Radon has a half-life of about 4 days, so the radiation should exponentially decrease as all the radon decays. After a week, the radiation level should be much lower.
Just how bad an idea is it to store radioactive mineral samples in the basement workshop? If you have various samples of uranium ore, thoriated lantern mantles, or other mildly radioactive materials, bring them into a fairly sealed room that has been under measurement for a couple of days. See if the radon level builds up over the next week. If you try this with a little piece of uranium, a radioactive lantern mantle, or similar radioactive sample in a large, sealed box, the reading will be quite high. I now keep my radioactive stuff outside!
Let the collection unit remain off for a day or two. Place it facing the ion chamber, leaving the gap for air flow, as described earlier. After the meter reading has settled, turn on the fan and plot the radiation level vs. time. The reading should climb over about an hour period and eventually flatten out. This plot illustrates a process known as equilibrium. At the beginning of the plot, little radioactive material is on the filter so there is little decay occurring. But as the radioactive material builds up, usually at a constant rate, the amount of decay occurring on the filter increases; the more radioactive material there is, the more likely there will be decays. Eventually, the increasing rate of decay equals the rate of accumulation due to the air flow. This balancing act is the equilibrium point. The curve will have an exponential shape.
Coffee can, baby formula can, cookie tin, about 4" diameter and 5" tall. Chambers can be made in all sizes and shapes. You may wish to remove the insulating coating of plastic on the inside walls but I've found it to be unnecessary, and it does block alpha radiation from the steel of the can.
Internal wire: 22 AWG Buss wire (.025") (Radio Shack 278-1341 is 24 AWG). Copper wire is less "springy" than most other metals so it doesn't vibrate as badly when the chamber is bumped. A moving wire will cause the reading to bounce around a bit.
1/4" hole for RCA connector, RadioShack phono jack: 274-346. Feel free to use other connector types or no connector at all, simply passing the wire through the hole.
Grizzly H5890 Repairman's Taper Reamer or similar. This is a handy tool but not necessary. A ragged hole made with a large drill bit will work, too.
Large rubber feet, RadioShack 64-2342. Those little rubber furniture bumpers are fine, too.
Darlington transistor, MPSW45AG (mouser.com) or TN6725A (Jameco.com). Other modern NPN darlington small-signal darlington types will work fine, but avoid power types.
30 AWG "wrapping wire," RadioShack 278-503. This is thin wire that is easy to use and bends easily. Stiffer wire might pull on the transistor with too much force.
Battery Snap, RadioShack 270-324.
Optional 1k resistor, RadioShack 271-1321. The value isn't critical. Even a value as high as 100k should work fine.
Epoxy, GORILLA Brand available at Home Depot or any 5-minute type.
Radon Daughter Collector:
Squirrel Cage Fan: CF-339 from All Electronics Corp. (www.allelectronics.com). Other types are fine. Computer case fans can also be used to make a collector.
12 volt power supply: PS-1270 from All Electronics Corp. (www.allenectronics.com). Any power supply that can run the fan is fine.
Speaker grill cloth: http://www.amazon.com/Speaker-Grill-Cloth-Black-Yard/dp/B0002ZPLM0 Substitutes are fine, including thin dusting cloth, nylon hosiery material, or other cloth that will allow for some air flow.
Pipe clamp: Found in any hardware store. The aluminum foil window may also be taped on with electrical tape, but make sure the foil is snug against the lip of the can so that it makes electrical contact. The clamp will allow the foil to be replaced with screen for detecting air ions or alpha particles.
Here are a few ideas that are difficult for beginners, but intriguing, nonetheless:
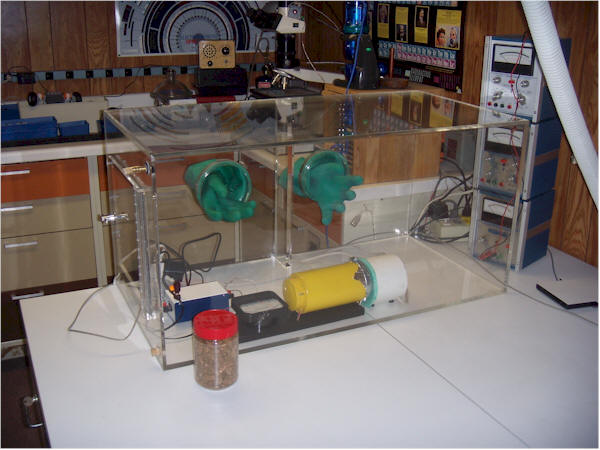
Build an airtight glove box and place the radon detector and a sample of a mineral to be tested inside for a week or two. The sample should be large and sealed in a flat container or airtight plastic bag. Nearly all the radon from the air should be gone and the meter reading will be low. If you are impatient, run a tube from outside the house such that fresh air can be pumped into the box to speed up the purging. Fresh air has very low levels of radon. After the radon level is reduced, open the container with the sample, wait a couple of days, and observe the new meter reading. Using this technique, you might be able to test various mineral samples for radioactive materials by using radon's ability to escape from the solid. One of the better ion chamber circuits will give more sensitivity (see the "Super Sensitive" chamber, for example.)
My setup is shown below. The white tube hanging down at the right of the photo brings air in from outdoors and there is a little gas fitting in the side of the box at the top left for the connection (not connected in the photo). A hole at the bottom has a cork that is removed when purging. No sample is in the chamber in this photo. I would place a large "Tupperware" container in the bottom, fill it with the sample, snap on the lid, shut the door and purge the air for a couple of hours. Watching the reading drop on a computer screen is an easy way to tell when equilibrium is reached. Watching the exponentials flatten gives reassurance that the indications are valid. When the lid from the sample container is removed (with the gloves), the resulting release of radon will cause the reading to exponentially grow, albeit slowly.
A commercial radon detector in the same chamber will quickly give a lower reading, once the collector is turned on, probably because a significant portion of the free radon daughters are being caught by the filter, effectively lowering the level elsewhere in the box.
Test the effects of second-hand smoke on radon daughters using "simulated lung tissue," the way I did.
The collection filter is kept wet to simulate moist lung tissue. There's probably a better way. Why does smoke really drop the reading? Is second-hand smoke really protective? Can you get a grant from a tobacco company? : ) It probably isn't a good experiment for Science Fair competitions; making the judges angry is a bad approach.
I can imagine the MythBuster guys doing this with pig lungs or something equally disturbing.
Mount an array of side-by-side ion chambers on wheels, like a push lawnmower. Replace the aluminum foil windows with something more rugged like wire screen. The chambers would point at the ground, allowing a wide area to be swept for samples of uranium ore, etc. Each chamber would have a light above it to indicate a sudden increase in the reading. It would be like a metal detector for radioactive mineral samples.
"Dirty bombs" could use elements above radon in nuclear mass. So, as the bomb sits in the terrorist's hideout, it should be producing radon. That radon could work its way out of the hideout to create elevated levels in other nearby rooms. Can you design a discrete radon daughter detector for covertly scanning buildings? Don't actually scan public buildings; the detector itself will look pretty alarming to authorities. Proof of concept is a good stopping point!
How about a device that attaches to the central air system to monitor the radioactivity accumulating on the air filters? That might be entertaining for the home. Every time the central air turns on, the radiation will begin to build on the filter. A wall-mounted meter would be quite the conversation piece. The half-life of the radon daughters that would be measured with such a setup is about half an hour. This one just might become a techlib.com project in the future.